

 Bethany is a stay-at-home mom to her 14-month-old son, L. She's in love with her husband Dan, to whom she's been married for six years and four months (but who's counting?) She has a degree in writing, and her favorite punctuation mark is the semicolon (seriously.) Before she became a stay-at-home mom, she worked for four years at a nonprofit foundation and then for two years as a substitute teacher. In her spare time, Bethany likes to nap, read good books, write, scrapbook, and spend an embarrassing amount of time playing Candy Crush Saga. She is afraid to throw anything away in case she needs it for a craft project. Bethany and Dan moved to Ohio in 2009 for Dan's medical residency, and they surprised themselves last year by deciding to stay in Ohio after he graduated. Bethany is a Christian, and she teaches a Wednesday night class at her church for first through third graders. She writes about (and finds the humor in) her mommy-ing adventures on her blog, "I was promised more naps."
 Nursery DIY
How To Re-purpose Crib Bumpers
When I was pregnant with my son, I decided to decorate the nursery in a jungle theme. We chose to wait until L was born to find out his sex, so I wanted the nursery to be gender neutral (although it ended up looking more boy-ish then gender neutral, which worked out well in the end.) I found a cute bedding set that I liked and used the blanket as a decorative wall hanging.

After I made up the crib with the sheet and bed skirt, I was left with adorable crib bumpers that I had no use for. We had decided not to put them in L's crib (since the American Academy of Pediatrics recommends that parents don't use them,) but it seemed like a waste to just throw the bumpers in a closet (or even worse, in the garbage.)
I Googled a hundred variations of "how to reuse crib bumpers," but all of the ideas required both a sewing machine (which I don't have) and some sewing and design knowledge (which I definitely don't have.) Finally I found a post on an online forum that suggested using the crib bumpers as window valances, but there were no instructions or accompanying pictures. So I decided to wing it.
Since I don't have a sewing machine, it had to be a no-sew project. But since crib bumpers are already the right height and shape, they can easily be repurposed as valances even by those of us who can't sew.

First, I took the two longest pieces of the crib bumper and cut off the ties on the bottom (as close to the seam as possible). Then I pinned them to the back of the top of the bumper in between the other ties with safety pins (very high-tech.) I measured the window and then folded over the edges of the bumpers so that they would be the right length for the window and then pinned them so they'd stay the right length. I didn't cut the bumpers because I knew we were planning to move within the next year, and I wanted to be able to use them again on windows of a different size. (The window in our old house was long, so I used two bumpers side-by-side to cover the top of the window.) Then I just looped the ties over a curtain rod and tied them in bows to hang them.
 |
| My grandmother made the green curtains for my mom when she was pregnant with my older sister. They were a little too short, but I loved the idea of having something made by my grandmother in the nursery, since she passed away when I was 15. |
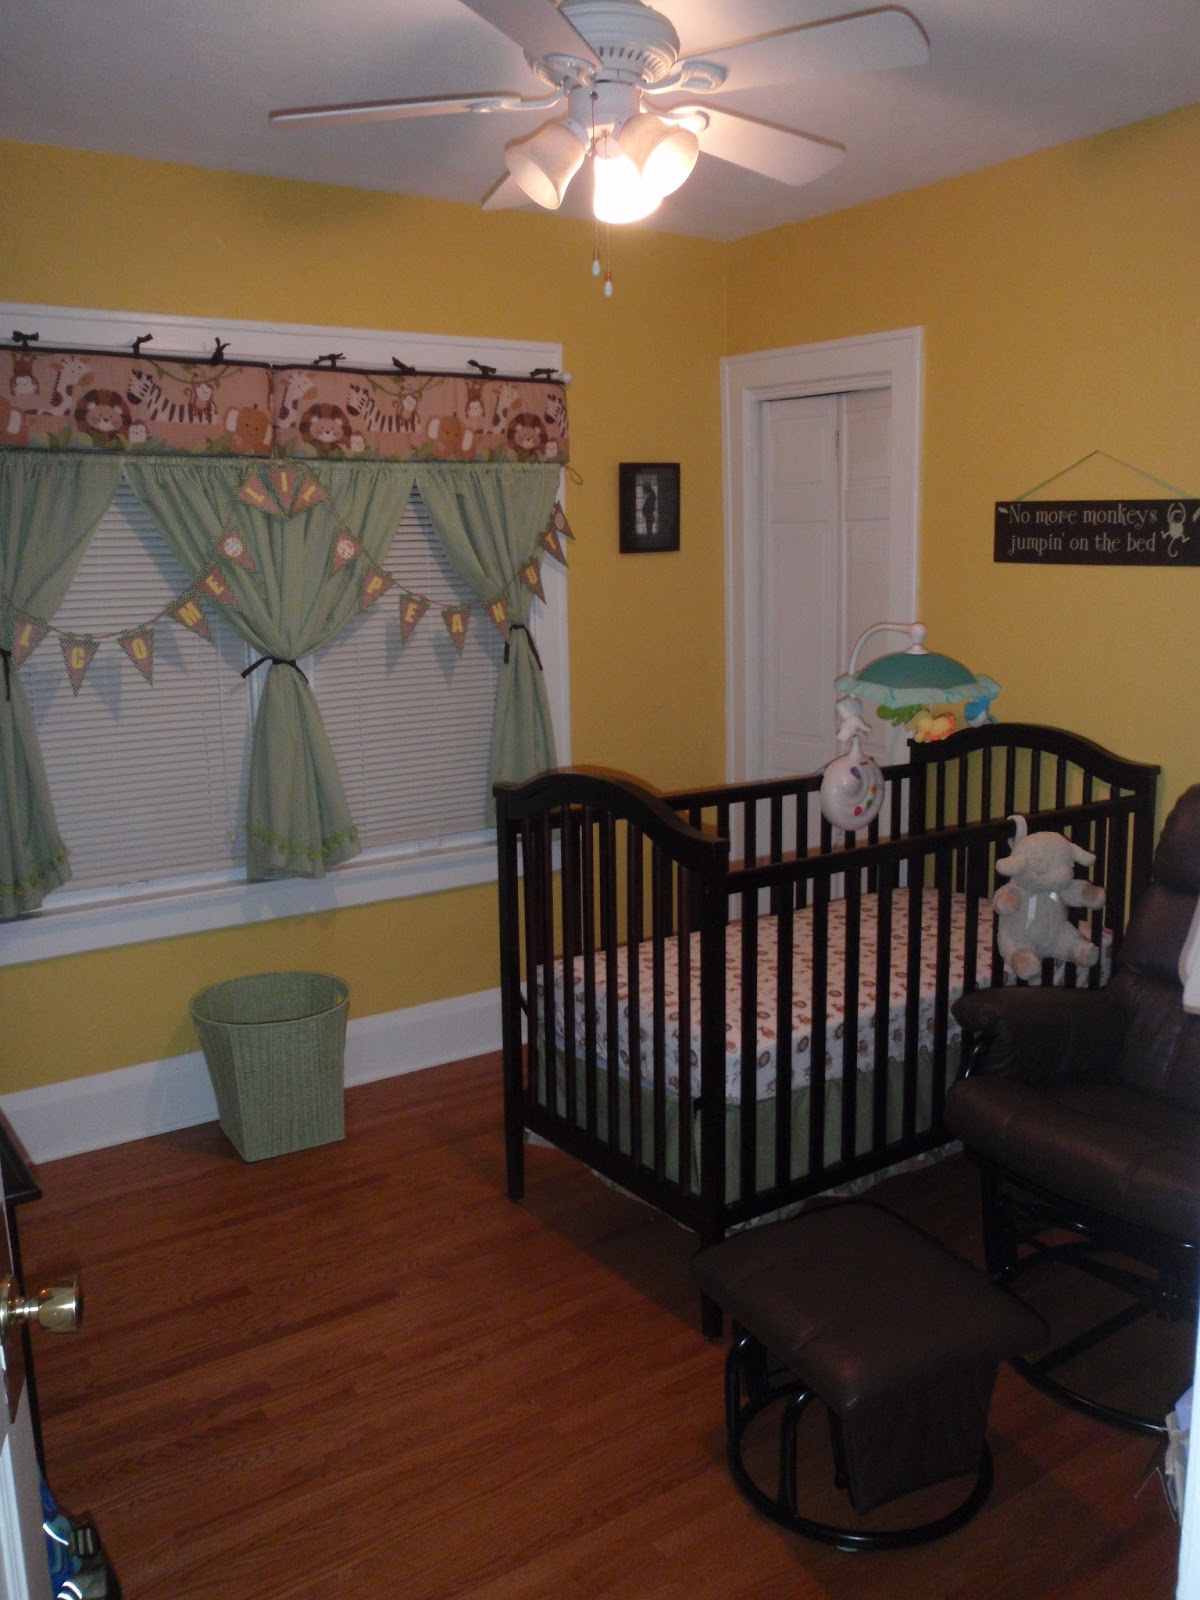 |
| The finished nursery. I used the extra ties I had cut off of the bumpers to tie back the curtains. |
Do you have any other ideas for repurposing crib bumpers? If so, please share them in the comments!

Bethany is a contributing guest blogger for Mommys Craft Obsession. To read more, visit her blog, "I was promised more naps."

Advertisement
You've made the switch to cloth for your little one,
now why not make the switch for yourself?
Omgoodness this is genius! Thanks for sharing I am going to take those items out of the goodwill box right now.
ReplyDeleteThank you! So glad you find it useful!
ReplyDeleteHow neat! I love how it adds a touch of the theme to the windows. I'm not very crafty (well I try, but am not so good!) and even I could do this. -Ashley N
ReplyDeleteI saw them used as teething guards on the top rail also. Great ideas.
ReplyDelete